Archive for blog
Finally, positive news on 7″.
Hello,
First of all my apologize for long silence – I just returned from China trip with positive news. Our 7″ touch-panels has been finally re-done, and yesterday was shipped from factory to us. I bring several pcs samples with me, will make photos for you tomorrow in office.
Batch shipment is expected to reach us next week, then we will bond them with LCD panels and add our electronic board. After that we will proceed with shipments.
UPDATE: here is photo of touch sample that we bonded to LCD panel. It fits perfect! That’s open-frame version, black frame version will make tomorrow.
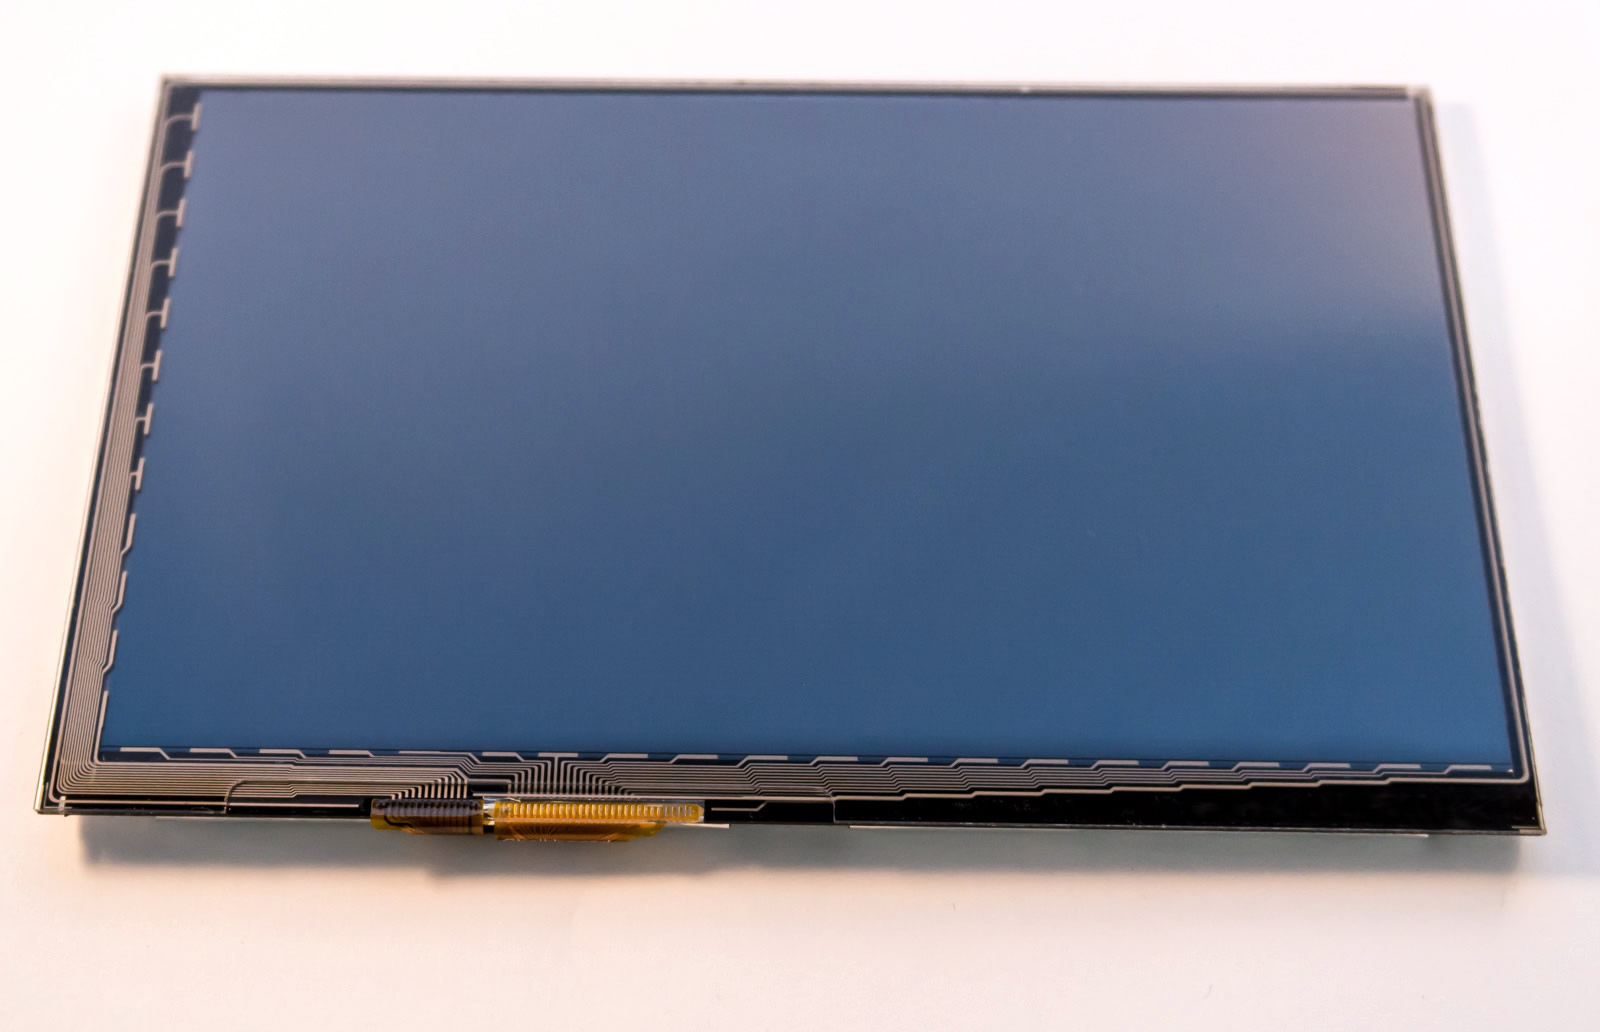
7in open-frame first photo
Delay with 7″ LCD shipping
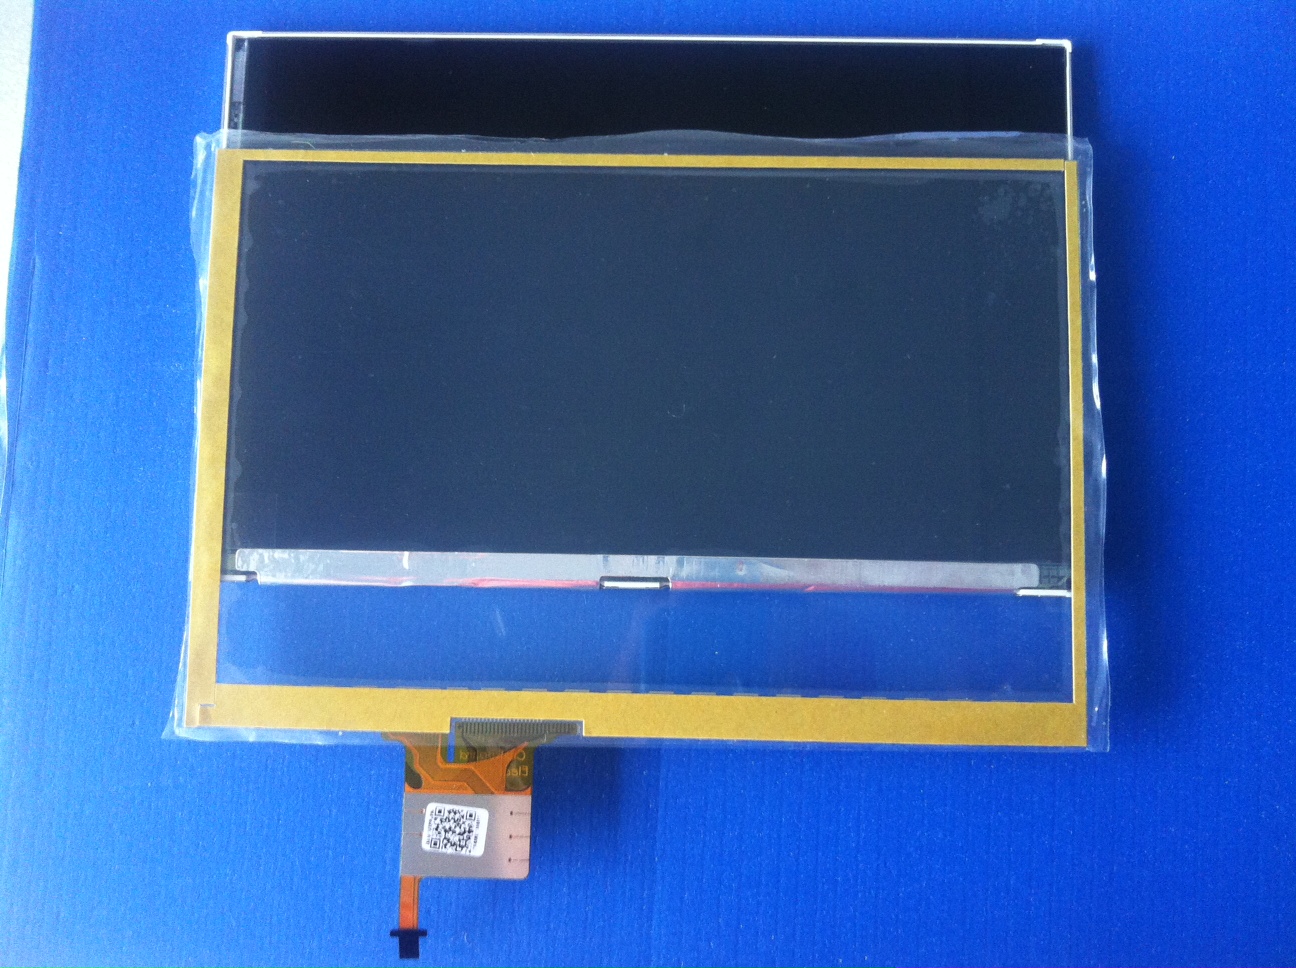
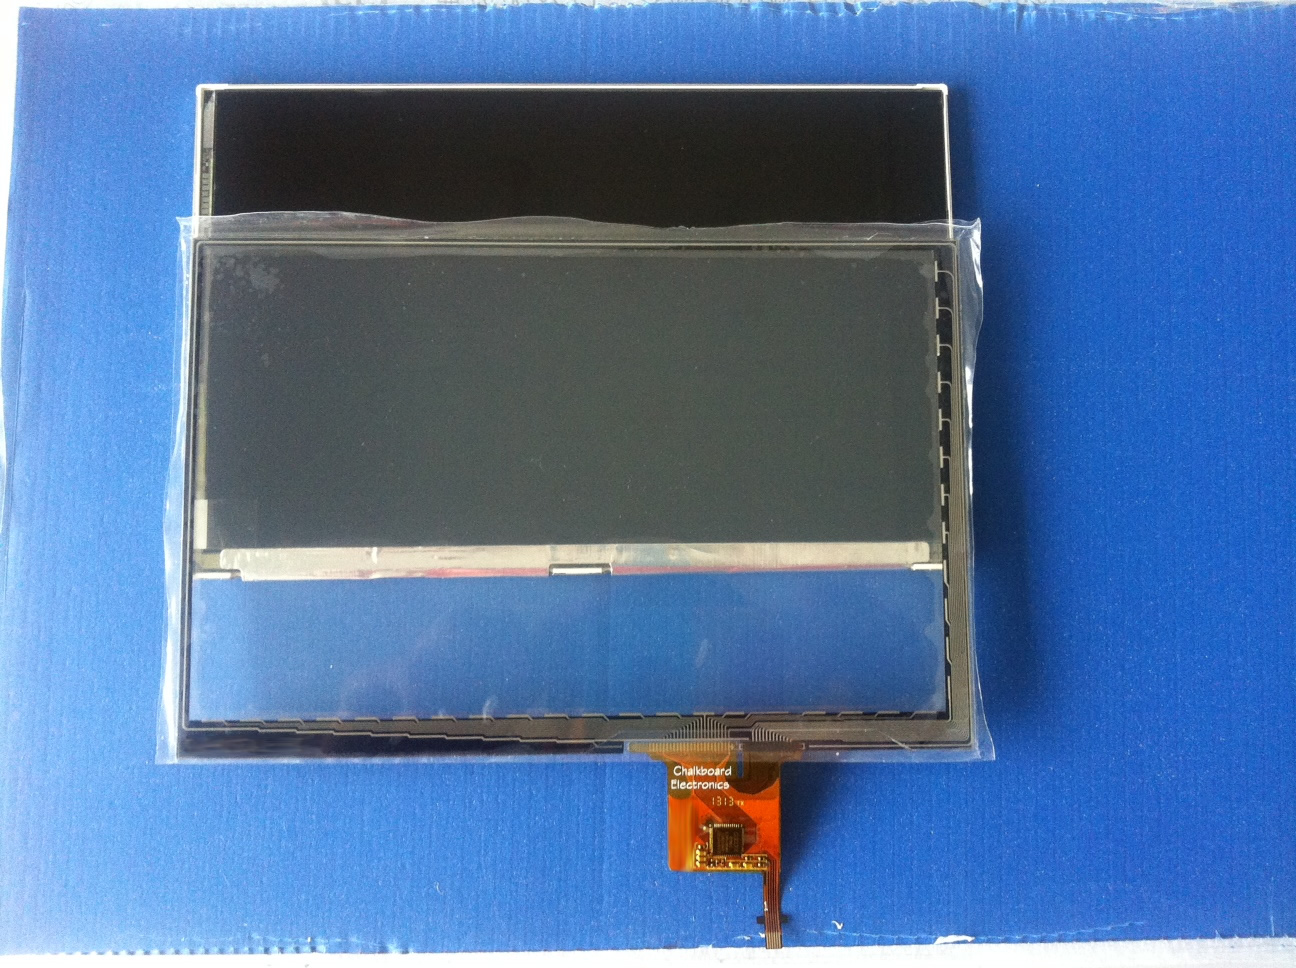
Not very good news for us guys – we are forced to postpone shipping of our new 7″ LCDs. Electronics is ready and assembled, LCDs are already in our office. But touch-panel factory made mistake with drawing – as a result we have vertically mirrored frame of touch panel and can’t bond it with LCD panel. Here are some photos that can explain it better (click on photo to get full resolution). Yellow color is back-side of panel with adhesive tape for bonding with LCD panel. Black color framed panel has the same mistake.
I’m currently out to China to touch-panel factory to do all the best to reduce lead time of re-done batch of panels from standard 4-6 weeks down to couple weeks. Currently, we found with supplier the way to reduce it to 3 weeks.
We take full responsibility for this delay, but can’t do too much to ship panels in April, therefore we want to offer the following:
1. Any request for money return will be immediately executed.
2. For those who is OK to wait for delivery we want to offer one of the following:
– free add-on of ambient light sensor, mini USB cable, micro HDMI cable, audio adapter and power adapter (please, mention your plug type) to your order
– or free upgrade from standard shipping to DHL
– or 15% individual coupon for any future purchase in our store
Drop e-mail to our sales team (sales@) with your order # and selected action.
7 inch 1280×800 capacitive multi-touch LCD
We want to present 7” capacitive multi-touch IPS LCD with 1280x800 resolution.
Features:
- fully integrated solution - no external boards and cables
- slim design (<10 mm thickness including electronic and connectors)
- easy installation – just connect and it will work
- mini HDMI input accepts any resolution up to 1920x1080 (FullHD)
- slim-profile power connector (OD=2.6mm, ID=0.65mm, positive central pin)
- mini USB connector for touchscreen with support for driver-less single touch, or multi-touch with additional driver
- audio engine provides decoding of HDMI stream audio and outputs it to standard 2.5mm connector
- external ambient light sensor for automatic brightness control
- internal LVDS scaler allows to get HDMI with any resolution from virtually any HDMI source, like RaspberryPi, Beagleboard/Pandaboard/, Beaglebone Black, Hackberry, Odroid, Cubox, mk802 and others Android stick clones, Gooseberry, Nitrogen/Sabre, OLinuXino-A13, normal PC/notebook, video players, etc.
Available in 2 versions:

Display specifications:
- Display: 7” full-color a-Si TFT with IPS technology
- Native resolution: 1280x800 pixels
- Aspect ratio: 16:10 (widescreen)
- Display colors: 262K (6-bits per color)
- Active area: 152mm (H) x 95.5mm (V)
- Surface treatment: 3H glass, Glare
- Weight: 110 grams
- Input voltage: 5V DC
- Operating temp: -20C … 70C
- Storage temp: -30C … 80C
- Power consumption: 3.1W (typ)
- Brightness: 400 cd/m2 (nits)
- Contrast ratio: 800:1
- Viewing angle: 89 deg (all directions)
Technical drawings:
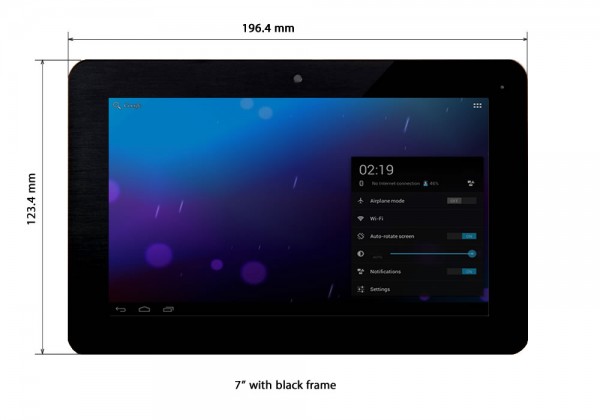
Technical drawing: 7 inch with black frame
Technical drawing: 7 inch with open frame
Order can be placed here:
7 inch LCD with black frame
7 inch LCD with open frame
How to calibrate N-Trig touchscreen
Normally, capacitive touchscreen does not require calibration like resistive. This is because capacitive touchscreen has grid of sensitive tracks on panel surface and can get exact information about finger position. But because detection is based on measuring of changed capacity of surface, therefore sometime it can require calibration of sensitivity. Some of our customers noticed that cursor can behave like crazy when you touch screen (and sometime even without any touch). This can happen when touchscreen controller has increased sensitivity, and it responds to any change of capacity nearby of screen surface and touch controller itself. We know that most of you use this panel right on your workbench full of turned on equipment, powered wires and cables, always turned on solder station – I have exactly the same situation on my desk, so I know it for sure 🙂 In such cases we propose to do the following:
- First of all, take into account that any capacitive touchscreen requires to be placed inside enclosure. This will eliminate most problems with phantom mouse shakes and clicks.
- If you use it without enclosure, then please take care to remove any EMI emitting equipment, connected/powered wires, unbalanced fluorescent lamps, etc. as far away from touchscreen as possible. At least nothing should be under green PCB of touchscreen controller on the bottom side of LCD panel.
- Next is power supply. Check that your power supply provides clean 5V signal on its output. We also recommend to use UPS or good power filter on AC side.
- Finally, you can use special Windows tool to calibrate screen sensitivity to your current environment. Here is link to calibration utility: http://goo.gl/TLK4P. You should connect your panel to Windows PC, use only USB – others connectors are not required. Then run this program, it should find panel, then will ask you to not touch panel during calibration (calibration does not require any interaction with touch surface during whole procedure)
Stock status and project update

SMT pick and place machine
I receive a lot of emails requesting for stock update every day. Therefore, I decided to clear out the situation with the stock issue and also to reveal our plans for the future of our LCD products. First of all, our company has been running for 8 years in the electronic industry business. We design and manufacture embedded systems for consumer, industrial and military applications, we have our own SMT factory and experienced development team. This branch of open-source LCD solutions was initiated 2 years ago as a step to help electronic enthusiasts to get cheap and easy LCD+touch solution for their project based on BeagleBoard and their successors. We never considered this as a business, and did it mostly for fun. But 2 years of successful sales, many positive reviews and number of serious business projects that arise as a result convinced us that open-source hardware can play an important role in the business of electronic company. Therefore, we decided to pay more attention to this branch and invest money to buy separate SMT line for our LCD products. This should eliminate delays with order processing and shipping, and help us to keep constant stock of ready LCD bundles. We already received new stencil printer and lead-free reflow oven, now awaiting for arrival of automatic pick-and-place machine. Whole line should be mounted in 2-3 weeks, after that we can ship your orders next day after receiving. Currently, we had delays with LCD production because our main SMT line is busy with our normal orders for others embedded products. Separate SMD line will solve this problem.
Now regarding our plans:
- Most of our office employees will be out for Chinese New Year holidays from 9th till 17th of February.
- Technical support for current customers will be on line, support@ email will be active.
- All emails sent to our sales team (sales@) will be answered after CNY holidays.
- We will install SMT line during CNY holidays and will manufacture enough boards to keep stock alive.
- All orders placed from today will be shipped on first come-first serve base starting from February 18.
- As a token of appreciation for your continuous support, we will offer instant 10% discount for all orders placed and paid during this period.
Finally, our 7″ capacitive solution is near completion. You will get 1280×800 LCD (yes, IPS!) with multi-touch touchscreen with USB interface.
How to get touchscreen working
Some Linux distros come with these drivers included in kernel, others not. If you can’t use touchscreen after Linux is running in X GUI mode or if you don’t have assigned input device in console mode, then you should do the following:
- First of all, check all connections. We had many cases when customers forgot or incorrectly connected touchscreen to miniUSB add-on board.
- Connect just touchscreen through USB cable to normal PC running Windows. If touchscreen is detected and you can use it in Windows, then all connections are OK and you can proceed further.
- If your Linux kernel does not include drivers for touchscreen, then you should recompile kernel with the following options:
- for AUO LCD (1024×600 px): “Device Drivers –> HID Devices –> Special HID drivers –> HID Multitouch panels“, option name: CONFIG_HID_MULTITOUCH, available in mainline kernel since version 2.6.38
- for LG LCD (1280×800 px, black frame): “Device Drivers –> HID Devices –> Special HID drivers –> N-Trig touchscreens“, option name: CONFIG_HID_NTRIG, available in mainline kernel since version 2.6.31
- If you run Android, then you can encounter problem with non-correct touchscreen vs screen resolution. This happen because Android supposes default screen resolution for external LCD as 720p or 1080p (touchscreen is connected by USB and is considered as external device), but our LCD is 1024×600 or 1280×800. You can easy check it by simply turning on option “Show touches” in Settings->Developer options of Android. Then you will notice the difference in real position of touch and Android touch position. This can be easy improved by placing one of below files to /system/usr/idc folder of Android rootfs. After that touchscreen size and LCD size will match.
File for Ntrig touchscreen (1280×800, black frame)
File for Cando touchscreen (1024×600)
See below links for additional information on touchscreen devices functionality under Android:
Touch devices in Android
Input device configuration files - You can use console command getevent (sources for Linux are here: getevent.zip) to check what touchscreen returns when you touch it. Also, you can get more details about touchscreen and its modes with commands getevent -p and getevent -i.
- N-trig touchscreen can be tuned with some parameters:
- min_width – minimum touch contact width to accept
- min_height – minimum touch contact height to accept
- activate_slack – number of touch frames to ignore at the start of touch input
- deactivate_slack – number of empty frames to ignore before deactivating touch
- activation_width – width threshold to immediately start processing touch events
- activation_height – height threshold to immediately start processing touch events
They can be changed right from console, see here for details: http://baruch.siach.name/blog/posts/linux_kernel_module_parameters/
- If you have problems with touchscreen, like “crazy” cursor jumps or “phantom” mouse clicks, then try to follow this guide How to calibrate N-Trig touchscreen
- Still no success? Drop e-mail to support@chalk-elec.com and provide description of problem + photo of your LCD touch connection + output of commands “lsusb” and “dmesg” entered in Linux console.
RasPi performance with touchscreen LCD

We had many questions from our customers regarding video from previous post on release RaspberryPi LCD solution: https://www.chalk-elec.com/?p=1553
One guy on forum noticed that CPU usage is 100% during whole demo, others guys decided that problem is with drivers for our LCD/touchscreen and this can burn main processor 🙂
In real, problem is not with driver, but with python game Gemgem. I asked our engineer to record 2 videos: one with normal LCD monitor and mouse, and another with our LCD+touchscreen, with the same version of Raspbian and system settings as in original video. I will gift LCD bundle to first guy who will find any difference in performance on both videos.
Long awaited RaspberryPi LCD solution is here!
Ok, we have important announcement to make for all RaspberryPi fans out there, including all members of our team as well. We have been working on the LCD solution that converts HDMI to LVDS, which allows you to connect LCD panel to RasPi. It looks like this:

RaspberryPi LCD solution
I know that many guys has been expecting for RasPi LCD solution from us many months ago. I personally got millions of emails and requests about the release date. We made mistakes trying to implement it with DSI interface that is available on Raspberry Pi. We even made agreement with Toshiba about their DSI-LVDS bridge IC. Unfortunately, DSI in controlled through GPU, and all GPU code is closed by Broadcom. Big mistake, that cost us several months.
Current solution works through HDMI interface. So, this adapter is pretty universal, and can be used to connect bare LCD LVDS panel also to others boards with HDMI interface (I have dozen of them on my table for tests).
You can buy our HDMI-LVDS converter and try to connect to own LCD panel, but I would suggest to get it in bundle with our 10″ LCD that has integrated multi-point capacitive touchscreen. It is just $134.99 for whole bundle – and you will get your own extra cheap ($170 including RasPi price) 10″ tablet with high quality IPS screen, a great 1280×800 resolution, capacitive multi-point touchscreen and RaspberryPi as a heart.
Video of bundle in action:
Make 10″ tablet with your RaspberryPi
Link to web-store: https://www.chalk-elec.com/?page_id=1280#ecwid:category=3094861&mode=category&offset=0&sort=priceAsc
We have limited quantity at the moment, so hurry up! Next batch will be available in September.
We start selling BeagleBone cape for LCD with LVDS interface
Finally, we finished with all tests and are ready to present our new LCD cape for BeagleBone.

BeagleBone LCD cape
We will sell it as a separate assembled PCB ($34.99) to connect to any of your LCD with LVDS interface, and also as a plug-and-play bundle ($134.99) with our 10″ 1024×600 LCD with capacitive touchscreen and ambient light sensor. Here is photo of bundle in action:

BeagleBone LCD cape in action
Selling will start first week of July. First 10 buyers will get 10% discount. Follow us on Twitter to be among first buyers: Follow @ChalkElec
Out for short holidays to Italy

I will be out of office from 7th till 16th of April. Will go to italy (Rome and Venice) for short trip. Really need to have some rest to be prepared for announce of our new boards that we will introduce end of this month. Will answer all your technical questions after coming back. Orders will be processed and order related questions will be answered as usually by our Sales department.
Bye!
UPDATE: Just returned back to office. Will work to answer your emails and questions now.
