Our blog
Cardash LCD cluster with RaspberryPi
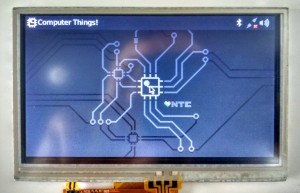
Couple days ago we made road test with our new Cardash LCD. It is 12.3″ sunlight-readable LCD (1000 nits) with resolution 1920x720px, connected to Raspberry Pi. LED driver board of this LCD takes power from standard car 12V input, and provides current to LCD backlight (this beast takes 16 Watts!), and also 5V/3A to power RaspberryPi or any other computer module you want to use. RasPi reads OBD2 data from OBD2-USB adapter (can be changed to Bluetooth OBD2 if you hate wires), and output it on LCD as a normal car cluster dash. We designed open-source software for this where you can easily configure how it looks like and how it works with OBD2; add any additional gauge and designed to look exactly like your car dash display or any to your liking. It is C++ project on GitHub that uses Qt5 cross-platform framework (yes, you can run it on Windows as well). All graphics are defined with QML markup language, custom OBD2 commands processing are defined in XML file.
We are working really hard to start selling these wonderful cardash LCD kits, price is not finalized yet, but it will be around $230+ for LCD with video converter board, LED driver board, and all cables. RasPi is not included, but I guess you have couple in your drawers 😉
Refurbished products with 50% discount
We just opened the new section in our webstore with refurbished products: Refurbished products
All products are fully tested, can have minor scratches and are available with 50% discount.
Please, take note that most of them have no touchscreen functionality.
Some updates, what kept us busy
Hello, everyone!
We kept silent for many months, and we had reason for this – we were working hard on new products and will present them soon in our web store:
- First of all, we are going to offer cheap LCD solution for cheap C.H.I.P. board. We decided that $9 board deserves $19 LCD, and now preparing mass production of 4.3″ LCD with resistive touchscreen that can be directly connected to connector U13 on board with single cable. You will get high-brightness 480×272 screen with integrated touch and backlight control.
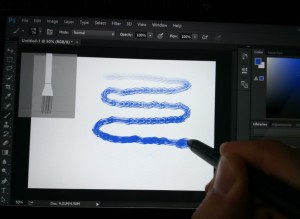
- Next news will be interesting for all new Van Goghs and Rembrandts who are in digital arts or just want to draw his cat’s portrait on PC. I’m talking about digitizer with pressure-sensitive stylus. Currently, there are several companies who offer such kind digitizers. The most famous is Wacom, plus several less known companies like Huion, VisTablet etc. Of course, Wacom is the best, but their prices are crazy. You have to sell your kidney to buy their digitizer. We are going to offer 10″ digitizer with gorgeous FullHD (1920×1080) screen based on Wacom technology that you can simply connect to your PC/notebook with HDMI+USB. Then you simply buy Wacom stylus and start your career in digital art. Price will be around $130.
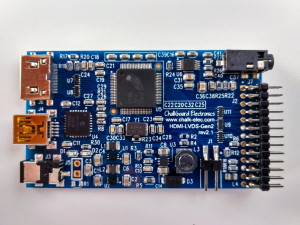
- We finished development of new hardware platform called Gen2, it includes 3 HDMI boards with different LCD interfaces: LVDS, MIPI and eDP. All are compact, have convenient pin-type header for LCD cable, interface protection chips, HDMI audio decode, all required on-board voltage generators (like VSP/VSN for MIPI panels) and backlight control with 1024 steps. Boards will be available for purchase in April with cost $34.95 each. We will also offer medium size (5″-7″) FullHD LCD panels for MIPI board.
- Finally, we will offer new versions of our popular black-frame and open-frame 7″ LCD panels based on Gen2 board. The price will be the same, but you will get more robust solution with long-term support.


Follow us on Twitter @ChalkElec to get instant updates.
How to use FullHD+ LCD
Our 10″ FullHD+ LCD bundle supports 24-bits color and has WUXGA (1920×1200 px) resolution. Take note that your host board should support 1920×1200 resolution, otherwise you will get no video output.
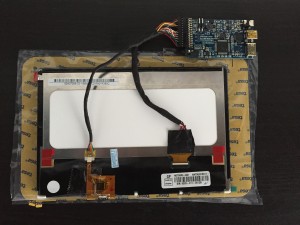
Bundle consists of LCD panel, HDMI converter board, and LVDS cable to connect converter to LCD panel. You can also buy optional cables (miniHDMI and miniUSB), power supply to power converter and LCD, ambient light sensor for automatic brightness control, and LCD holder: 10″ FullHD+ LCD with HDMI interface
HDMI-dualLVDS converter board has the following connectors:

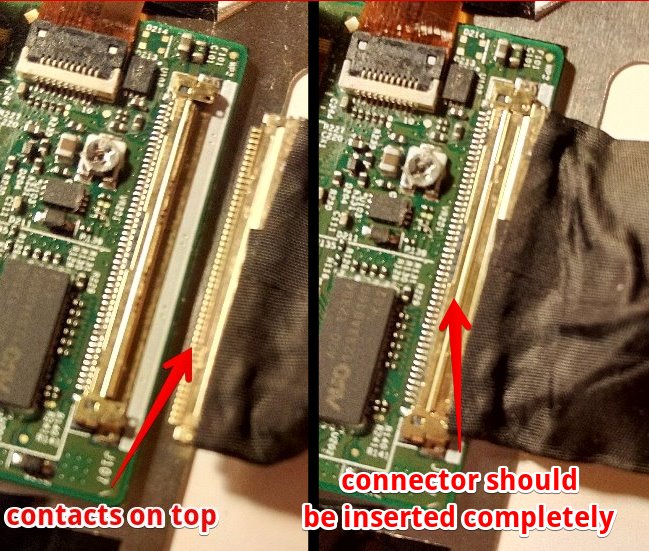
Connecting LCD
You should use included LVDS cable to connect LCD to HDMI converter board. Please, take care to correctly insert LCD side of cable – contacts should be on top. Use your nails or tweezers to insert cable completely into LCD connector.
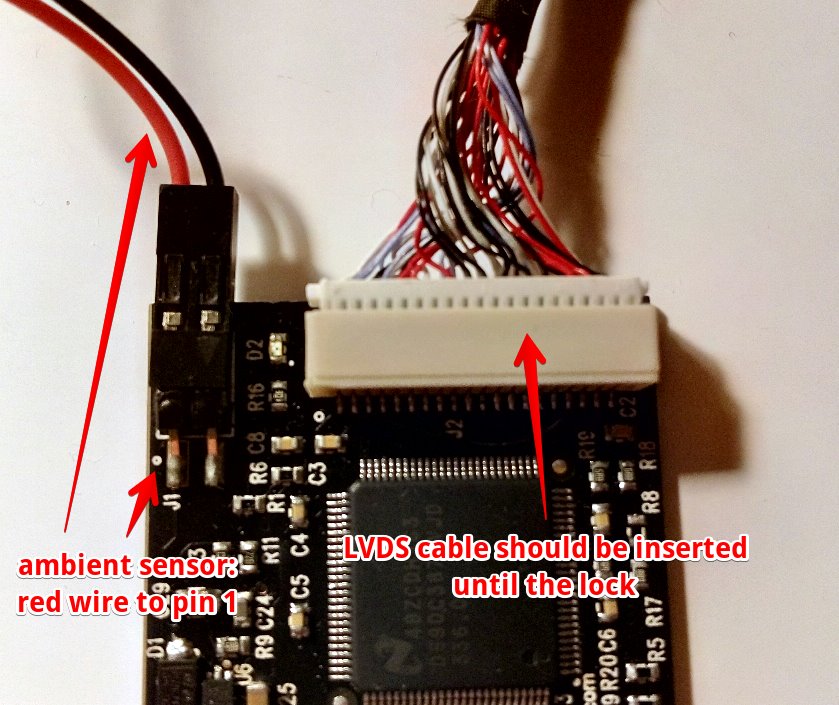
Optional ambient light sensor should be connected with red wire into pin 1 on board connector:
Logic and backlight voltages for LCD are generated on board and supplied by the same LVDS cable, so you don’t need separate power supply for LCD or backlight voltage generator.
Powering LCD
LCD with converter board take up to 1.2A/5A when backlight is set to maximum value. Board and LCD can be powered either by external power supply (5V at least 2A, jack is OD=2.6mm, ID=0.65mm, positive central pin) or by USB. By default it can be powered by external supply only. For USB power you should install 0R resistor in R12 position. Check that your USB host can provide enough current. CAUTION! Do not connect external power supply when R12 is installed, it can damage your USB port.
Basic LCD functionality
We ship LCD with simple demo firmware that turns on LCD backlight and video processor when input video signal is detected. If video signal is lost, LCD backlight will be turned off. On-board LED shows status of video signal – LED is on when active video signal is detected. You can always check that hardware is working well by connecting LCD with this basic firmware into standard PC running Windows. For advanced functionality you will need to update firmware as described below.
Firmware update with USB bootloader
We constantly release new firmware for our products to extend functionality and fix possible bugs. Converter board has embedded USB bootloader for easy firmware update. To update firmware you should switch converter board to bootloader mode by shorting both pins on ambient light sensor connector with jumper, then turn on power. Green LED will light on, and you will have 3 seconds to remove jumper in order to start bootloader. Green LED will blink when bootloader is active. You should follow steps 4 and 5 of this firmware upload procedure: Firmware upload.
HID USB bootloader program for PC is available here: HID USB bootloader.
Latest version of firmware is always available here: FullHD+ firmware
Ambient light sensor and backlight brightness
Ambient light sensor is available as an option, and can measure ambient light level for automatic brightness control.

Ambient light sensor should be connected to connector J1, red color wire to pin 1 on connector. You will need latest firmware in order to get automatic backlight control. Also, with last firmware you can control backlight from your host board or PC through USB HID commands: How to control LCD backlight (USB HID)
- Maximum brightness (MAX_BL parameter) is 35 for this 10″ LCD
- Report ID for backlight control is 0
Converter board schematic
Board schematic is available here: http://goo.gl/NSWTIQ
Technical drawing of LCD
Technical drawing of LCD is available here: FullHD+ LCD drawing
See in action
Video with dualLVDS converter board and our FullHD+ LCD is available here: FullHD+ LCD with HDMI dualLVDS converter
Follow us on Twitter to get instant notification about new firmware release: Follow @ChalkElec
